
Ready to Ship!

Multi-Line Decorative Foot
-54%✖ CURRENTLY OUT OF STOCK
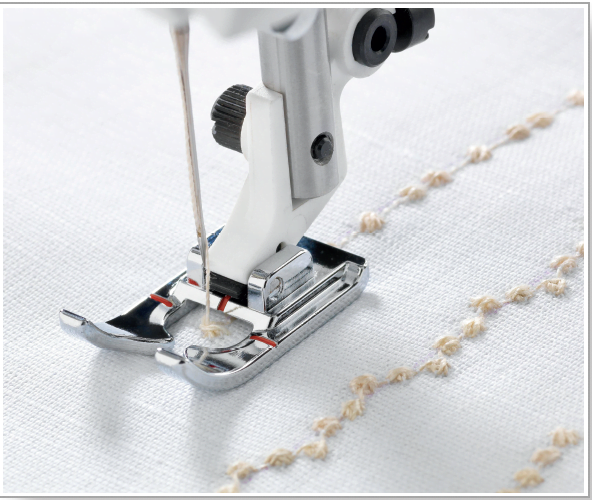
DescriptionMachine Compatibility: 1, 2, 3, 4, 5, 6, 7, 8, 9 Not sure which group your machine belongs to? Check out the Machine Compatibility Chart Use the Multi-line Decorative Foot to create evenly spaced borders with decorative stitches or as a guide when sewing Omnimotion and side-motion stitches. Guidelines are provided for accurately turning corners of ¼” (6mm) and ½” (12mm) measurements. How to use: Decorative Borders Thread your machine with sewing thread or decorative thread on top and sewing thread in the bobbin. Choose a decorative stitch. Snap on the Multi-line Decorative Foot. Mark a line on the fabric with a Pictogram Pen where the center of the stitching will be. Place Tear-Away Stabilizer under the fabric. Line up the presser foot on the marked line using the red center line on the foot. Sew the first row of your decorative stitching. Choose another decorative stitch. Move your fabric to the left. Decide what distance you’d like to have between the rows. Use the horizontal red lines to match up the start of each row. Sew the next line of stitching using the red lines on the foot as a guide while sewing. Mirror image the stitch and move your fabric to the right side of the center stitch. Sew the seam on the right side. Continue with more stitches to create a wider border. Tear away the stabilizer. Omnimotion or side-motion stitches Thread your machine with sewing thread or decorative thread on top and sewing thread in the bobbin. Choose an Omnimotion or side-motion stitch. Snap on the Multi-line Decorative Foot. To ensure a straight line of stitching draw a line on the fabric with your Pictogram Pen where the center of the stitching will be. Continue to mark one or two lines on each side of the drawn line. Place the fabric with Tear-Away Stabilizer under the presser foot. Sew carefully and let the machine control the feeding. Keep the marked lines and the vertical red lines on both sides of the presser foot parallel to each other when sewing. Tear away the stabilizer.